Wednesday, May 4, 2016

Cookie Pizza

I am always on the lookout for good kids' cookbooks, and this week at the library we came across a fun one: "Bake and Make Amazing Cookies" by Elizabeth MacLeod. I like it because it includes an introduction which explains some basic terms and techniques, and the kids like it because it is divided into the following sections: Holidays, For Special People, Seasons, and Just for Fun. The holidays section has theme cookies for every holiday from Groundhog's Day to Thanksgiving; For Special People includes recipes that make good gifts and that are easy to wrap up and deliver (or mail); Seasons has suggestions for spring, summer, fall and winter; and Just for Fun has crazy ideas like potato chip cookies, magic cookie "wands," and bee cookies complete with pretzel wings.

I let my kids choose any recipe they wanted to make - the only rule was that they both had to agree on it. My son immediately chose cookie pizza, and once my daughter realized it involved frosting and candy, she was 100% in favor.

We collected our ingredients (opting to skip the flaked coconut and substituting candied pecans for the plain pecan halves called for in the recipe), washed our hands, and got down to baking! The complete recipe is at the bottom of the page.

For the cookie base, you'll need butter, brown sugar, white sugar, an egg, flour, and baking soda. For the icing, you'll need confectioner's sugar, butter, milk, and vanilla. For the decorations, you'll need pecan halves, sweetened flaked coconut (I omitted this), chocolate bits, and whatever kind of candy you like or have on hand. We went with some butterscotch chips, a few small packages of Skittles, and a bunch of colored sprinkles. 

Be sure your butter is at room temperature before starting. If needed, you can warm it in the microwave at low power (20% or so) for 20-30 seconds. Do NOT melt the butter! It should be just soft enough to cream nicely with the sugars. Combine 1/2 cup (one stick) of butter, 1/4 cup white sugar, and 1/2 cup brown sugar and beat with an electric mixer on medium speed until creamy.
 

 Add one egg and beat until well-blended and creamy.
 

Combine 1 1/4 cups flour and 1/2 teaspoon baking soda and add. Blend well. The dough will be leaning toward the batter end of the batter-dough spectrum.


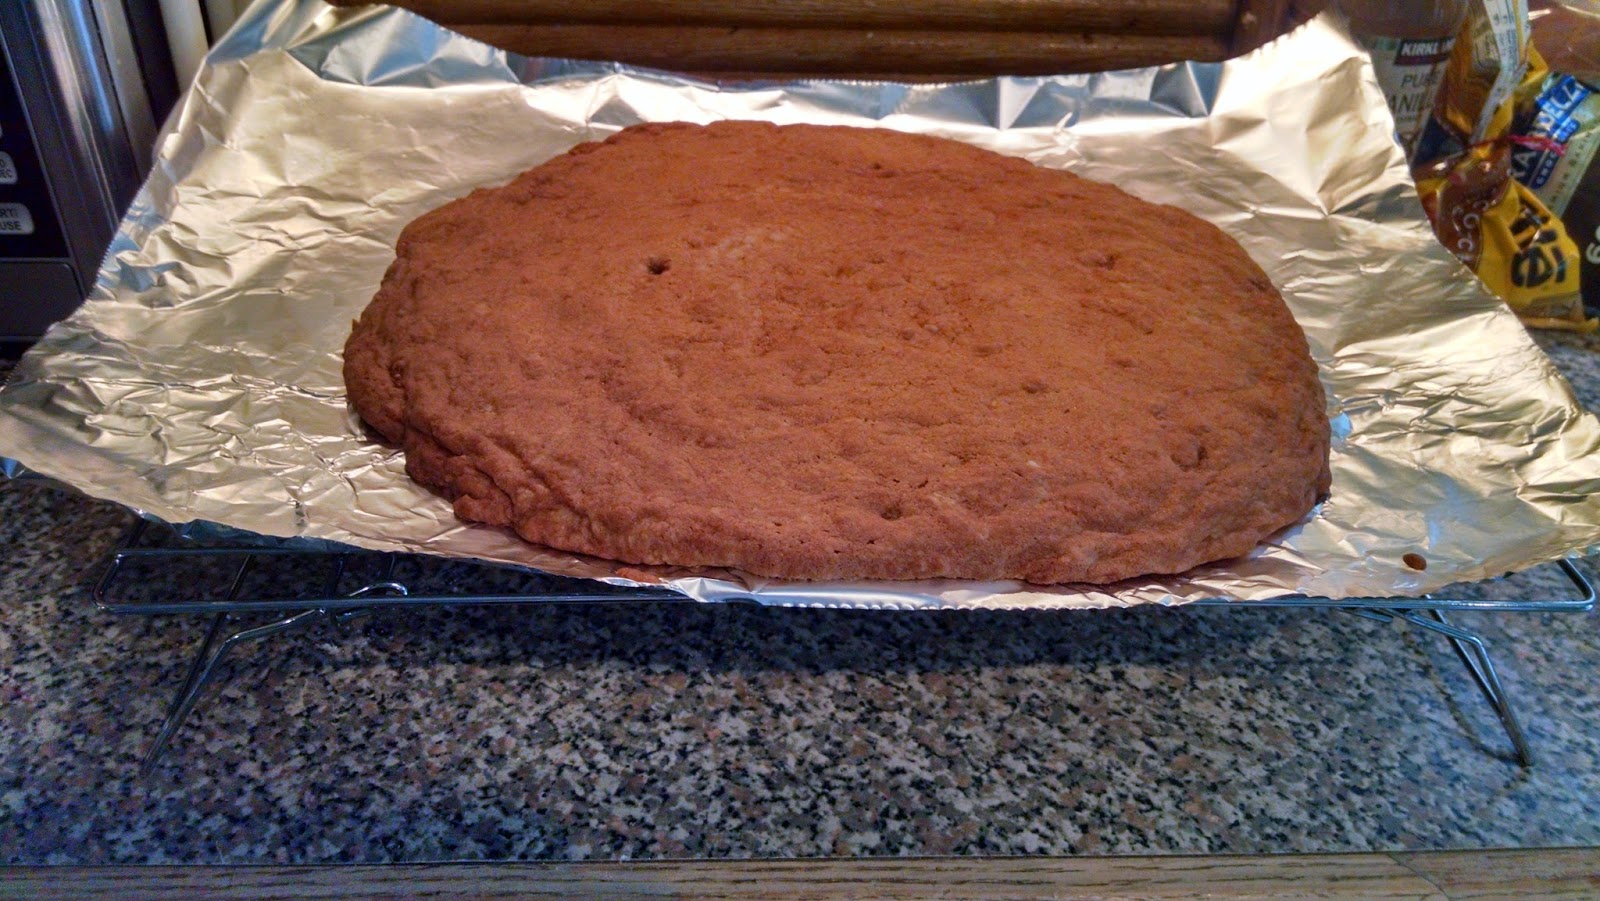
Cover a large cookie sheet with non-stick foil and spread the dough out to form a large circle (or football, or star, or whatever shape you like). I found this was easiest to do using the back of a large spoon. The dough will spread while baking.

Pop the cookie sheet into a pre-heated 350-degree oven and bake for 15 minutes. The dough should be golden brown and slightly soft to the touch.


Lift the foil sheet and place cookie on a cooling rack until completely cooled.

While the cookie cools, make the icing. Beat together 1-1/2 cups confectioner's sugar, 1/4 cup room temperature butter, 2 tablespoons milk, and 1/2 teaspoon vanilla. Scrape the bowl with a rubber spatula. If the finished icing seems runny, add a little more sugar; if it seems too thick, add a few more drops of milk.


Pour the icing on the cookie and spread it out with a knife or spatula. This recipe allows for a very generous, thick layer of icing. Adjust to your own taste.

I like my nuts in smaller pieces, so I chopped up my pecan halves before I sprinkled them on.


My kids each decorated their half of the cookie pizza with their favorite candies and sprinkles.

Once the toppings are on, it's time for the final chocolate drizzle! Put 1/4 cup chocolate bits in a microwaveable glass measuring cup or bowl. Heat for about 30 seconds (full power), then stir. The chocolate will be just a little softened.
 

Give the chocolate an additional 20-30 seconds and stir again. Once there are just a few lumps left, keep stirring and allow the heated chocolate to melt the remaining lumps - do not overheat the chocolate.

When it's completely melted, use a spoon to drizzle the chocolate all over the cookie.

Voila! The finished product!

Slice into wedges (make them small; this pizza is very rich and sweet!) using a pizza cutter and serve!


Cookie Pizza
1/2 cup butter (room temperature)
1/2 cup brown sugar (lightly packed)
1/4 cup white sugar
1 egg
1-1/4 cups all-purpose flour
1/2 teaspoon baking soda
1-1/2 cups confectioner's sugar
1/4 cup butter (room temperature)
2 tablespoons milk
1/2 teaspoon vanilla
1/2 cup pecan halves
1/4 cup sweetened flaked (or shredded) coconut
1/4 cup chocolate chips
Assorted candy pieces and sprinkles

Preheat the oven to 350 degrees.

In a large mixing bowl, beat together 1/2 cup butter and brown and white sugars with an electric mixer until creamy. Stir in the egg. Add the flour and baking soda and blend well.

On a baking sheet lined with non-stick foil, pat the dough out to form a circle about 12 inches across. Bake for 15 minutes, until golden. Cool completely on the sheet on a cooling rack.

In a medium bowl, beat together confectioner's sugar, 1/4 cup butter, milk, and vanilla until smooth and creamy. Spread evenly on cookie. Sprinkle with pecans, coconut, and desired candies. Melt the chocolate chips in the microwave and drizzle over finished cookie. Cut into wedges and serve.

NOTE: The undecorated cookie may be stored at room temperature for up to 1 week or frozen for up to 2 months.

Bookmark and Share

Thursday, April 21, 2016

Why Do We Do All That We Do?

This is school vacation week for my preschool-aged daughter, so I also made it vacation week for my homeschooled kindergarten-aged son. It's a relief for me in a way, because I get a break from planning homeschool lessons for a week, but it's not truly a vacation, because I still need to put on the "mom" hat and make sure my kids aren't just sitting in front of the TV/computer/Kindle screen all week long. If they're playing in the yard, I need to keep an eye on them now and then; if I have errands I need to run, I have to take them with me; I need to take them to the park or to spend time with friends or to do something outside the house. Plus of course I still need to plan and make meals and keep up with the laundry and scrape playdough off the kitchen floor now and then. And on top of that, I'm frantically sewing costumes for a show that opens in just a few weeks, along with requests on the table to help with costumes for two other shows that are opening soon and in desperate need of extra hands. And hovering in the background of all this is work for a Board that I sit on and a committee that I chair, as well as two other committees that I'm involved with.

I'm wearing a lot of different hats this week.

In some ways, it's a relief to switch from one hat to another: when my hands are tired from sewing, I can "take a break" by catching up on Board emails; when my brain is spinning from trying to straighten out some disagreement on a committee, I can "take a break" by supervising my kids riding their bikes; when I'm tired of researching some homeschool topic I want to cover, I can "take a break" by making out my grocery list and going shopping (with two kids in tow, of course).

But it's kind of like circuit-training at the gym: You give your legs a break while you work on your arms, then you give your arms a break while you work on your abs, etc. But when your workout is over, you're still tired. You still need a break.

That's the hardest thing about parenting - heck, that's the hardest thing about life. You never really get a complete break! Someone always needs to be fed, some kind of work always needs to be done, some kind of conflict always needs to be resolved. So how do we get through it without collapsing from exhaustion or totally losing our minds?

The best solution I've found so far is to take a few moments now and then to consciously sit back and enjoy the results of all the work I'm doing. When I'm tired of sewing, I pull up photos of costumes I've designed and think about how satisfying it is to see my creations come to life. I think about the look on an actor's face when he puts on a costume I've made and suddenly feels his character spring to life. When I'm frustrated by my son's lack of interest in a particular subject, I remind myself of his excitement and enthusiasm about another subject. I try to remember times when he was so excited about learning that he grabbed a book and continued studying on his own. When I'm annoyed by the politics and conflicts on one of my Boards or committees, I think back to some of the projects we've accomplished together, the problems that we did solve in the end, and the groups and individuals that we've helped over the years. I remind myself of why I do all these things.

It's too easy to get so wrapped up in the process of what we do that we forget the reason behind what we do. I don't serve on the theatre board just so I'll have something to write on my resume when I go back to work, I do it because I love theatre and I want to help the many groups in our area learn their craft even better, and share it with our community. I don't make costumes just because I like to sew, but because this is an artistic outlet that allows me to think creatively, to physically create images that exist inside my head, and to contribute to a greater artistic vision. I don't homeschool just because public school wasn't the best choice for my son this year, but because I want to encourage my son's creative thinking and curiosity and natural love of learning. I need to remember to focus on those outcomes and not just the annoyances and difficulties of reaching those outcomes.

So what's getting me through this week of shopping and sewing and supervising and emailing and resolving is that mental checklist of results: a full pantry and happy tummies, a vest that makes its wearer smile, laughing and thinking children, averted crises, and compromises that leave all parties satisfied.

And then, just maybe, I can throw on one more hat for a little while.


Bookmark and Share

Wednesday, April 20, 2016

Snickerdoodles: This Is a Recipe Post, But It's Not JUST a Recipe Post

I am aware that I have not been blogging as much recently as I often have in the past, and I am also aware that I have been writing more blogs about cooking and cocktails than I have about my life and my children. I was NOT aware, however, that other people were missing my "kid blogs." But this past weekend when we visited my grandmother to celebrate her birthday, she dressed me down a little about it. Well, "dressed down" is a bit strong. Let's say, rather, that she let me know how disappointed she was every time she checked my blog and the latest post was still my recipe for bolognese.

So when I asked my kids if they'd like to bake something this afternoon, and they requested snickerdoodles, my first thought was, "Great, I can post a recipe blog!" But my second thought was, "Wait, I really ought to blog about my kids." But then my third thought was, "But I really WANT to blog about my kids." So I decided to cover all my bases and blog about both my kids AND my cookies. Which, not surprisingly, is an excellent combination.

My kids are at that really fun age, at ages 6 and 4-1/2 (and that half is crucially important), when they are perfectly capable of playing by themselves and keeping themselves entertained with minimal supervision, yet they also love playing with an adult. My daughter will happily make up a story with her dolls, but she's even happier if I grab a doll and play along. And my son loves to build Legos, but he has even more fun if I sit with him and ask questions and let him describe to me all the different characters and vehicles he's creating. I truly enjoy doing things with them, seeing their curious minds at work, and filling those sponge-like little brains with all kinds of information and experiences. So whenever I can find time to play with them, I do.

It's rare that I get the chance to work with both of them in the kitchen at the same time, but since they're on vacation this week (my daughter from preschool and my son and I both from homeschool), it was the perfect time for a trio of chefs to perform some kitchen magic. And perform it, we did! This snickerdoodle recipe is
pretty basic: if you bake at all regularly, you have everything you need on hand (with the possible exception of cream of tartar - which you SHOULD have, so you can make homemade playdough, but that's another blog for another day), it doesn't require chilling the dough so it's quick to make, and there are no fancy tools or equipment needed. In short, it's a great recipe to make with kids. So let's get started! As always, the complete recipe is at the bottom.

Oh, and since my cousin posted this fascinating article about cookie chemistry, I also shamelessly used the process as a chemistry lesson. (Wondering why this recipe uses room temperature butter, an egg and a yolk instead of two eggs, or both white and brown sugar? Read the article and find out! the author is experimenting with chocolate chip cookies, but a lot of the same processes apply.)

Whenever I bake with the kids, we begin by gathering our ingredients (there's nothing worse than getting halfway through a recipe and realizing you're out of something). For this recipe, you need butter, eggs, white and brown sugar, vanilla, baking soda, cream of tartar, salt, cinnamon, and flour.

Start with two sticks of butter at room temperature. If you have to, you can soften them in the microwave, but be very careful not to melt them. Use low power and check often! This is a good step to have kids help you with. They like the squishiness of soft butter (which is why we wash our hands VERY well before we begin - and multiple times during).  

Cream the butter together with 3/4 cup white sugar and 1/2 cup packed brown sugar. If you have a stand mixer, use it! If all you have is your faithful hand mixer that you've owned since college (*ahem*), that's fine, too. Be sure to scrape the sides of the bowl with a rubber spatula. Spatula duty is another good job for small helpers.


Next, separate one egg and toss the white (or save it in the fridge for another use - like adding it into tomorrow's scrambled eggs), then add the yolk and the second (whole) egg. I always separate the first egg. That way, in case I accidentally break the yolk, I can pretend I meant to do that and get a second chance with the other egg. My son is the official egg-breaker in the family, so this is always his job. He is also learning to separate eggs - which is another reason we tried with the first egg first. As you can see, he did an excellent job!

Add a tablespoon of vanilla (it seems like a lot, but it's the main flavoring in the cookie, along with the cinnamon, so don't stint!) and beat on medium for another minute or so.


Add a teaspoon of baking powder, a teaspoon of cream of tartar, 1/2 a teaspoon of salt, and a teaspoon of cinnamon. If using a hand mixer, I recommend folding these ingredients in with the spatula before beating with the mixer - it's less messy that way. Plus, little ones who like to stir can help.


When you're done mixing, the dough should be very soft and creamy, and uniform in color.

Gradually add 2-3/4 cups flour, beating on low at first. Scrape the sides of the bowl often. The finished dough should be quite smooth and only slightly sticky, although very soft.


In a smaller bowl, combine 1/4 cup white sugar with 1 tablespoon cinnamon. This will be used to coat the cookie balls before baking. I like to use a fairly wide, shallow bowl so it's easier to roll the dough balls around. My official stirrer was also a big help in mixing here. You can whisk the mixture together with a fork or a small wire whisk. You'll know it's mixed when the color is even, with no streaks.


Now, we're ready to roll out the cookies! First, preheat the oven to 325, then line a couple of large cookie sheets with parchment paper. Next, scoop out about 2 tablespoons of dough - about the size of a small munchkin. I like to use this handy little gadget, which probably has an actual name, but which I generally refer to as my "cookie flicker." You use the flat blade like a scoop, then pinch the handle and the upper edge pushes the dough neatly off the blade. If you don't have one of these, a) look for one at your grandmother's house or a local yard sale, or b) use a couple of teaspoons. This is my kids' favorite part of the whole cookie-making process; it's like playing with playdough!

Roll each ball very gently between your palms to form a smooth ball, then roll carefully in the cinnamon sugar until well coated, and place on the parchment-covered cookie sheet, leaving about 2 inches between cookies.


Bake for 10-12 minutes, until puffed and golden. The cookies will firm a bit as they cool, but undercooking can leave the middles a bit batter-y (not that that's necessarily a bad thing). If you want to get fancy, you can turn the tray around halfway through the baking time to ensure even baking, but I didn't find that it made a difference.

When done, allow the cookies to cool on the parchment paper. Don't bother using a cooling rack; if you put them on a cooling rack while they're still warm, they tend to droop through the wires. If you need to reuse the cookie sheet for another batch, just give them about 10 minutes to set and then lift the whole sheet of parchment off and leave it on the table to finish cooling, and re-cover the cookie sheet with another sheet of parchment.

 And, of course, the last - and BEST! - part of the process is enjoying the results! YUM!!

Easy Snickerdoodles

For the cookies:
1 cup butter (room temperature)
3/4 cup granulated sugar
1/2 cup brown sugar
1 egg plus 1 yolk
1 tablespoon vanilla extract
1 teaspoon baking soda
1 teaspoon cream of tartar
1/2 teaspoon salt
1 teaspoon cinnamon
2-3/4 cups flour

For the coating:
1/4 cup granulated sugar
1 tablespoon cinnamon

In a large mixing bowl, beat together butter and both sugars on medium speed until light and fluffy. Add in egg, yolk, and vanilla and beat for an additional minute, scraping sides of bowl with rubber spatula. Turn mixer to medium-low and add baking soda, cream of tartar, salt, and cinnamon. Gradually add flour with mixer on low, scraping bowl with spatula and mixing till just combined.

In a small, shallow bowl, combine sugar and cinnamon till well mixed and set aside.

Preheat oven to 325 and line two large cookie sheets with parchment paper. Scoop out two tablespoons of dough at a time and shape into balls, then roll in cinnamon sugar until well coated. Place on parchment, leaving about 2 inches between cookies. Bake for 10-12 minutes, until edges are slightly golden. If you prefer crisper cookies, bake for 2 additional minutes. Allow to cool on parchment.

Makes 3 dozen.


Bookmark and Share